Resin Jewelry Tutorial
You can cast the entire mold at one time and in 24 hours it will be done. However, I cast my resin mold in three different layers because I find that everything falls to the bottom of the mold and there is no depth. My first layer is clear; this makes sure nothing is settled on the front part of the resin piece. My second layer usually has a sticker, button, or any other object that I want to use. And my third layer usually has glitter or sand in it to make the background. Yes each layer has to set for 24 hours before I do the next one, but I find that in the end it is worth it.
Step 1:
Start off with resin mixture that can be found at any local craft store.

Step 2:
Gather some glitter, rocks, stickers, buttons, etc. Anything that you want to cast in the resin.

Step 3:
Measure out one part resin and pour in one part hardener (unless your brand of resin has different instructions).


Mix thoroughly for about 1 minute.

Step 4:
Pour mixture into to molds and fill up about 1/3 of the way.

Pop any air bubbles with a toothpick, or you can use a blow dryer and the heat will make the bubbles go away. Allow this to set for 24 hours to harden.

Step 5:
Repeat steps 3 &4, but after you pop all the bubbles you will need to add some type of embellishments for the center of the resin piece. This is usually where I put in a sticker, button, or small object.
Tip: Make sure to put everything facing down, as this will be the backside of your resin piece.

Below you can see that I added stickers and small shells to mine. After all of the resin pieces have something in them, let it set for 24 hours so this layer can harden.


Step 6:
Once the second layer has hardened it is time to finish the final layer. Repeat steps 3 &4, but after you pop all the bubbles you will need to add something for the background. This is where I usually add glitter, sand, or small glass beads. After all resin pieces have something to fill the background on them, let it set for 24 hours so this layer can harden.

Step 7:
The final step after the last layer has set is to flip the mold over and pop everything out.

You may need to trim the edges with scissors if there is any resin that ran outside the mold. You also have the option to sand the edges.

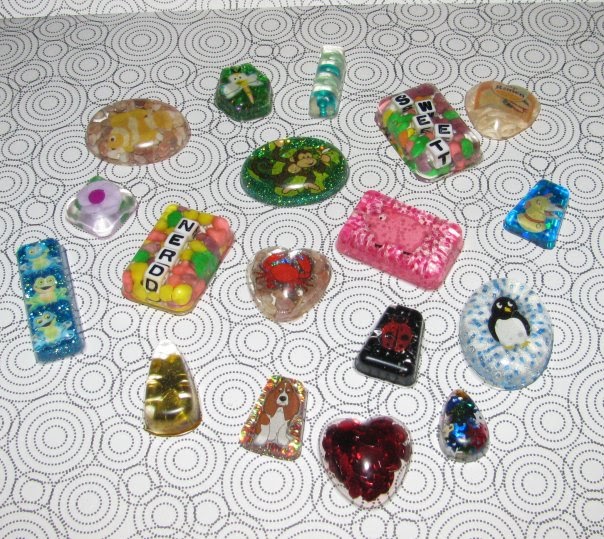
Now you have your finished product. You can drill a hold in it and string it, or you can glue a bail to the back and string it. Maybe you want to add a pin to it or add it to a hair clip. The option are only as limited as your imagination. Have fun.
Some more:

Some more: